Software Secrets: Lab Color
How do you use color effectively? Our Understanding Color series explores digital color techniques.
If you’re spent any time in Photoshop or Illustrator, you’ve probably noticed there are a few different color modes to choose from. HSB, RGB, and CMYK are self explanatory. RGB stands for red, green, and blue. CMYK stands for cyan, magenta, yellow, and key, which is black. HSB stands for hue, saturation, and brightness. These are the most commonly used, and probably where you’ll be spending most of your time, but what about Lab Color?
If you’ve ever spent some time messing around with it, you might’ve noticed you can get some pretty interesting results. Without understanding what variables you’re controlling, however, it can be hard to use it with any level of intent. So let’s get to know it a bit better.

You may have heard of the terms “additive” and “subtractive” in relation to color. These terms refer to the way different color models, or mathematical systems for representing colors, represent the color white. In an additive process, like RGB, the three different channels combine to create white.
Different hues are achieved by adding varying degrees of each channel. CMYK, on the other hand, is a subtractive process. Because printing substrates like paper are typically white to begin with, white is achieved by subtracting the four channels entirely. Various hues are achieved through the subtraction, rather than addition, of each printing channel.
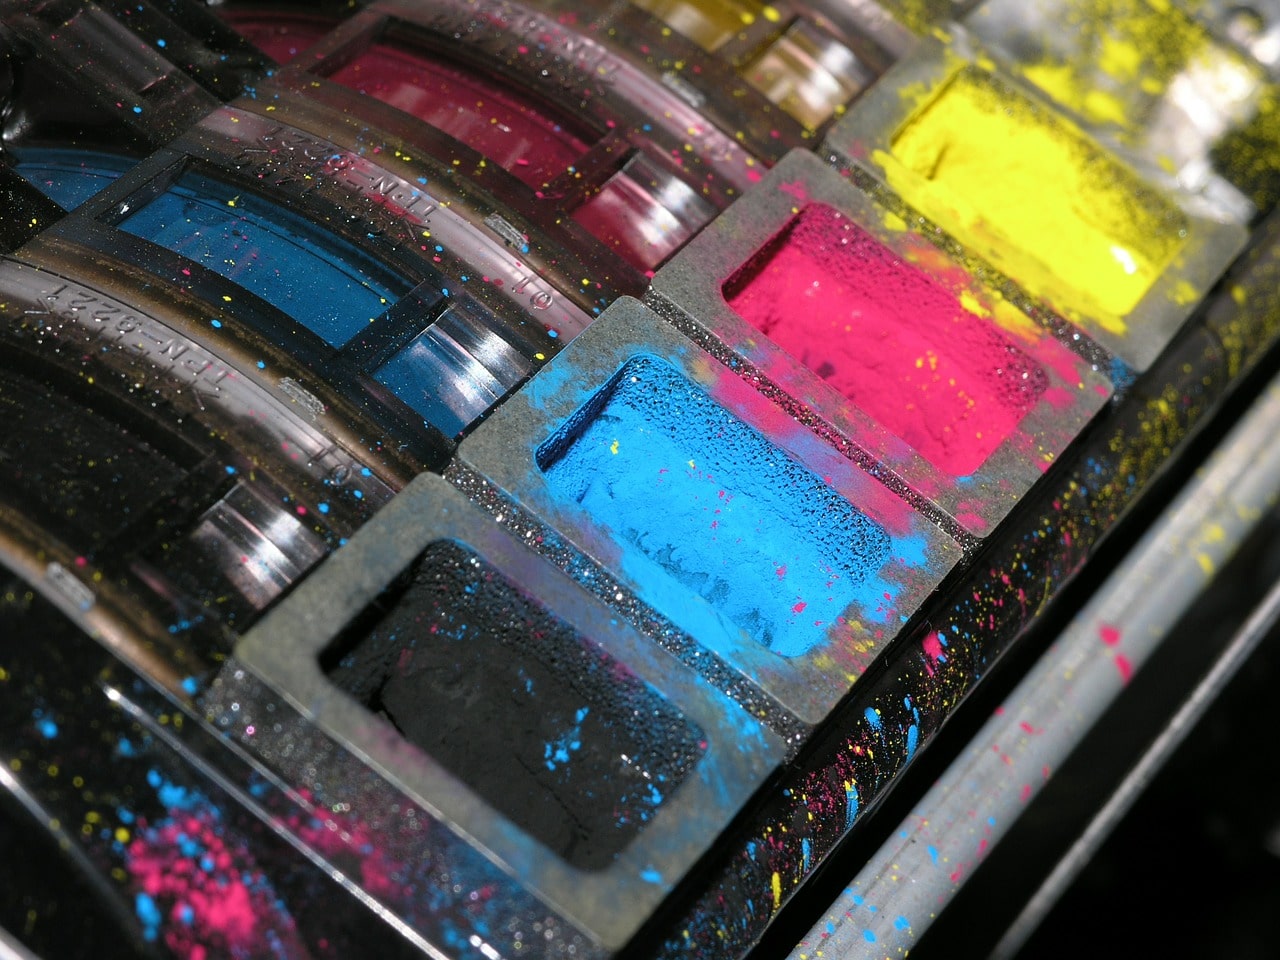
It’s a bit complicated but an easy way to remember which is which is by thinking about where they’re used. With RGB, you start with a black screen. To arrive at white, you need to add light. In print, you start with white paper. To keep it white, you would subtract ink. It’s not a perfect analogy but it gets the job done.
The CIELAB color space, or Lab Color, as I’ll be referring to it, was created by the International Commission on Illumination. The way Lab Color represents color is vastly different from other color models. The L value controls lightness, with a value of zero representing black, and a value of 100 representing white.
Here’s where it gets interesting. Rather than a single color, A represents an axis from green to red, and B represents an axis from blue to yellow. Lab Color was designed to replicate how humans perceive color and required a more complex model to map colors beyond the limited gamuts of RGB and CMYK.

So how, as designers, can we use Lab Color? Let’s start by opening this image in Photoshop and changing the image mode to Lab Color.
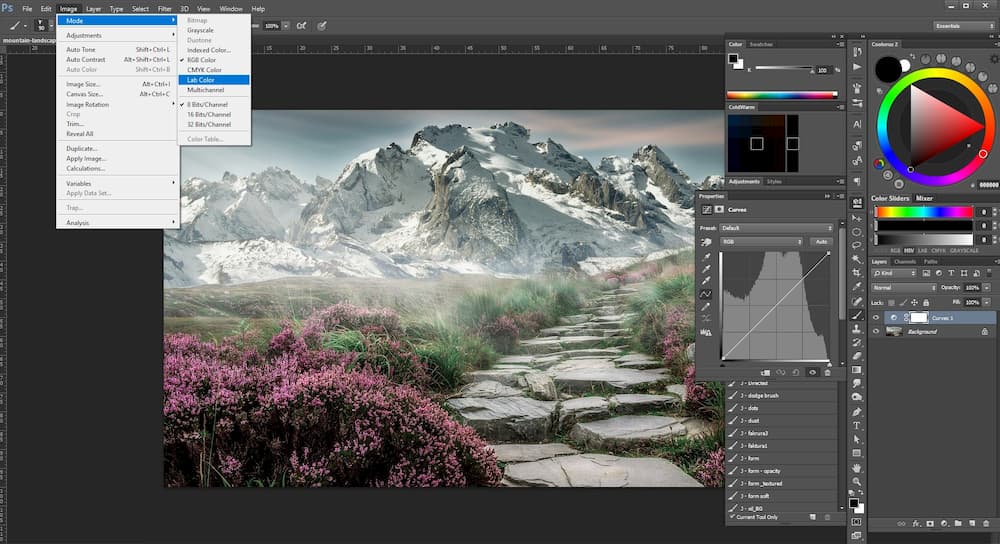
Unlike RGB and CMYK, where changing the value of a single channel will affect the color structure as a whole, Lab Color gives you a channel to affect the value of light independent of color. It’s a bit like adjusting the contrast and exposure of a RAW image. The easiest way to demonstrate this is by using a curves adjustment layer, so let’s make one.
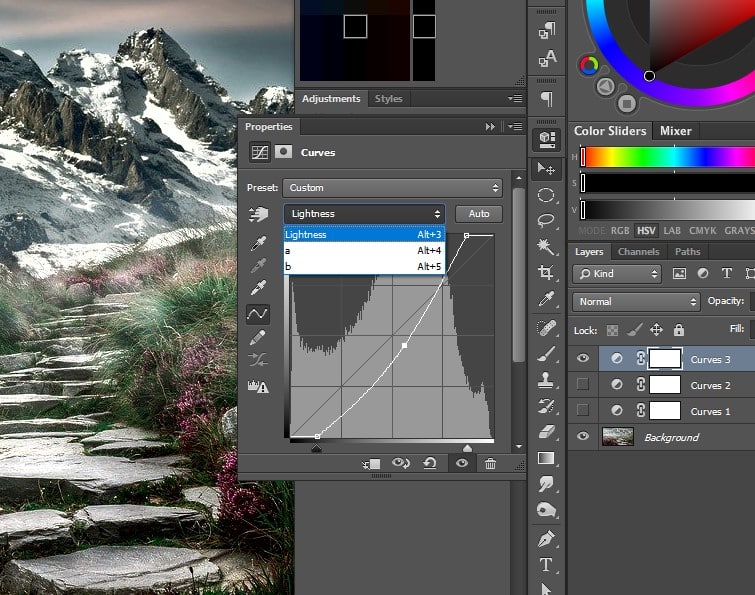
You’ll notice that we’ve got our three channels, Lightness, a, and b. Using only these three channels, let’s see how we can transform the mood of this image.


Here we’ve managed to quickly create two very different moods using only a curves adjustment layer. Lab Color presents some unique opportunities for photo editing that can’t be achieved using more conventional means like saturation and exposure. It’s an easy way to pull some additional detail out of your images or inject some drama. Give it a shot and see for yourself.

Taylor is a concept artist, graphic designer, illustrator, and Design Lead at Weirdsleep, a channel for visual identity and social media content. Read more articles by Taylor.
ENROLL IN AN ONLINE PROGRAM AT SESSIONS COLLEGE:

